Pages

Wednesday, February 23, 2011

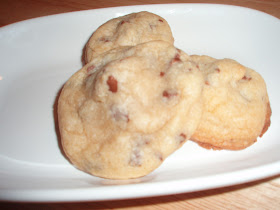
Chocolate Chip Surprises


You know how much I love candy and cookies combined. It's the perfect match of two of my favorite things.  So when I saw a recipe on the Hershey's website, I had to try these.  Following the original recipe about a year and a half ago, I liked the cookies in theory, but was disappointed in the finished product.  The cookie itself was dry and not very flavorful.  It should have occurred to me when there were no eggs or extract in the recipe, but this was before I paid attention to such details.

I decided to try the concept again, this time adapting my basic chocolate chip cookie recipe to the baking method from the Hershey's recipe.  The result was a rousing success.  My recipe, the same one I used in my M&M Cookies, made for a cookie with a great texture and flavor, with the sweet surprise of a Hershey's Kiss inside.  I also like the idea that if you put these in a tin or on a platter, your guests won't necessarily know what to expect.  It sort of just looks like a chocolate chip ball.

Chocolate Chip Surprises


Ingredients:

2 cups flour
1 teaspoon baking powder
1 teaspoon salt
2 sticks butter, softened
1/2 cup white sugar
1 cup brown sugar, packed
2 teaspoons vanilla
2 eggs
1 cup mini chocolate chips
60 Hershey Kisses, wrappers removed (be creative--use any of the Kisses varieties.  I'm thinking of making these using the Mint Truffle or Cherry Cordial Kisses)

Mix flour with baking powder and salt in a medium mixing bowl and set aside.

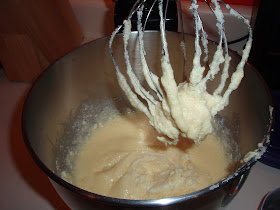
Beat butter until light and fluffy, then add sugars and beat until creamed thoroughly, scraping sides of bowl as necessary.  Mix in vanilla and eggs.  Stir in flour mixture until incorporated.  Add mini chocolate chips and stir to combine.


Using a medium cookie scoop, scoop a ball of dough into your hand.  Flatten the dough out a bit.


Put a Hershey Kiss in the center of the dough.


Mold the dough around the Kiss, covering completely.


Warning: I started to roll the balls in my hands, like I normally would with the Peppermint Pattie or Rolo Pillows, but then I lost track of which way was "up" for the Kiss.  I don't know if it matters, but at the time I was afraid if the tip was on the bottom , the cookie might spread differently.  After baking these though, I don't think it made a difference. 

Place on a parchment or Silpat lined baking sheet about 2 inches apart.


Bake in a 375 degree F oven for 8 minutes or until lightly browned.  Turn baking sheet 180 degrees halfway through. If using more than one sheet at a time, rotate positions in the oven for more even baking.


Cool on pans for 2 minutes then remove to wire racks to complete cooling.


Makes 5 dozen.

Happy Baking,
The Cookie Princess

Wednesday, February 16, 2011

Brownies


So the name isn't very exciting.  I have to start somewhere.  These are a fabulous basic brownie recipe that I intend to use a base for delicious and gooey brownie concoctions yet to come.  I usually make brownies from a box, so this was a test to find a brownie recipe that was relatively easy, but still had the texture and flavor of your typical brownie.  I read through probably a half dozen options before deciding to go with this one.  The result was a fudgy brownie with a moist but not cakey texture and a nice edge that didn't get too crunchy.

This recipe comes from a Penzey's Spices catalog, submitted as Best Brownies Ever by Michael Zionts.  I chose this one because I liked how Michael explained the bake time and thought the chocolate chips in the batter would add to the fudginess without making the brownies cakey.

Brownies


Ingredients
2 sticks butter, softened
2 cups sugar
2 teaspoons vanilla extract
4 eggs, lightly beaten
3/4 cup cocoa powder
1 short cup flour (1 cup minus 1 Tablespoon)
1/2 teaspoon baking powder
1/4 teaspoon salt
1 cup semi-sweet chocolate chips

Cream together butter and sugar.  Add the vanilla and mix until smooth.  Add the eggs and mix well, scraping sides of bowl if necessary.


In a separate bowl, sift together cocoa powder, flour, baking powder and salt.


Gradually add to the wet ingredients, mixing well after each addition.  Fold in the chocolate chips.

Liberally grease a 9 x 13 inch pan (I used a heavy dose of cooking spray).  Pour batter into pan and smooth evenly.


Bake at 350 degrees F on the middle rack for about 25 minutes.  Remove from oven and jiggle the pan; if the middle jiggles sloppily, put it back in the oven and bake for 2-4 minutes.  Keep doing this until cracks just start to appear and the middle JUST stops jiggling.  (I baked for 34 minutes, but Michael said 40 minutes was the magic number for him).


Remove brownies from oven and let cool completely.

Since I made these as a Valentine's treat for Dave, I wanted to decorate them a bit.  So I used some prepared frosting and holiday sprinkles.


Spread a layer of frosting on top of the brownies, as thin or thick as you like.  I used just about half the can of frosting.


Instead of just going wild with the sprinkles, I took heart shaped cookie cutters and placed them gently on top of the frosted brownies.


Then I used a spoon to carefully tap sprinkles inside the cookie cutters, resulting in heart shaped piles of sprinkles across the pan.  Or you could just go willy-nilly with the sprinkles.


Makes 24 brownies.

Happy Baking,
The Cookie Princess

Printer Friendly Recipe

Pin It

Monday, February 14, 2011

Strawberry Cheesecake Pops


A little Valentine's treat for your sweetie.  I actually made these for my friend Cindy. She was in need of a little cheering up and was craving cake.  And my friend Kate wanted me to make them just because, so I figured this would be win-win.

Cake pops are cropping up all over, but my inspiration for them comes from Bakerella and her beautiful blog.  She has infinite more patience than I do for the decorating, but the standard cake pops dipped in chocolate are super delicious.  And even though this was my first time, I didn't follow Bakerella's recipe exactly.  The cream cheese worked great and definitely made for a cheesecake style consistency.  But I'll try these Bakerella's way soon and let you know how they turn out.


Strawberry Cheesecake Pops


Ingredients

1 packaged strawberry cake mix
vegetable oil, as called for on box
water, as called for on box
eggs, as called for on box
8 oz cream cheese, softened
milk chocolate for dipping
white chocolate for dipping
sprinkles for garnish (not pictured)

Prepare cake mix according to instructions on box. 


Bake in any size pan or pans you like. 


After baking, allow cake to cool completely and remove from pan.  This is yet another reason why I don't do cakes.  I can never get them out of the pan in one piece.


But in this case, it doesn't matter because we're going to crumble it up anyway.  Because I really wanted the light pink to be the color of the cake pops, I trimmed off the browned edges and crumbled the rest of the interior of the cake into the food processor.

Cut up cream cheese and add to crumbled cake in food processor.  Pulse until crumbs and cream cheese combine.  You should end up with a uniform ball of yumminess.


Now the fun part.  Roll the dough into roughly one inch balls.  I used a small cookie scoop and then formed the balls with my hands. 


Place balls on a tray or pan and repeat until full or you fun out of dough.  Then put the tray or pan in the freezer for about an hour or until the balls are firm.


Melt the chocolate and stir until smooth.  Melt the chocolate in batches as you dip the pops.  And use a narrow container. The little bowls I used were too shallow, so I had to work to get the chocolate up to the stick.

Place a lollipop stick in each of the cake balls.  Push it through as far as you can--you don't want the ball falling off in the chocolate, and as the balls come back to room temperature, they'll be more likely to fall off.


Take one pop and roll it in the chocolate, trying to get a thick coating all the way around.  Keep turn the stick and keep the pop against the edge of the container to finish it off.  Dip quickly in sprinkles.


Here's where the problem was--I didn't have a place to put them after I dipped them.  So I had to put them top down, like caramel apples.  I put them in a container lined with waxed paper and it turned out fine.  And the ones dipped in sprinkles camouflaged the flattened tops.  Dave was working on the styrofoam ball I bought for presenting the pops (he pre-poked holes in it for the lollipop sticks because it was too thick). In hindsight, I would have bought another piece of foam--like a brick or something--to use after I dipped the pops. 


After I dipped them and placed them on the waxed paper, I did chill them for about 15 minutes so the chocolate could set.  You could also forgo the sticks and just have cake balls. Use two spoons or two forks to ensure even coating of chocolate and place on waxed paper to set.

Makes 40 pops.

Happy Baking,
The Cookie Princess

Wednesday, February 9, 2011

Oatmeal Muffins


Muffins are such a great treat.  They are yummy, great for breakfast or a quick snack and super easy to make (most of the time).  These are my go to oatmeal muffins, from Jean Childress' Country Kitchen Muffin Cookbook.  They are great as is, but this time around, I stuck a little strawberry jam in the middle (like the Strawberry Sour Cream Muffins) for a little extra flavor.  It eliminates the need to put butter on them.  You could also add chopped or dried fruit to the batter for another level of flavor and texture.

Oatmeal Muffins


Ingredients

1 1/2 cups rolled oats
1/2 cup brown sugar
1 cup buttermilk
1 egg
1/4 cup vegetable oil
1 cup flour
3 teaspoons baking powder
1/2 teaspoon baking soda
1/2 teaspoon salt
1/4 teaspoon cinnamon
fruit jam, jelly, or preserves of your choice (optional)

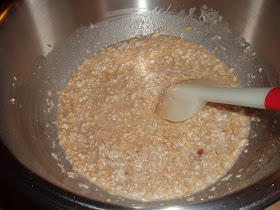
Combine rolled oats, brown sugar, buttermilk, egg and oil.  If you don't have buttermilk, measure 1 cup of milk and add 1 Tablespoon of vinegar.  You'll get the consistency you need, but not the same tangy flavor.  I don't think I've ever used actual buttermilk, so I don't know that I can compare.  But I always use milk and vinegar.


Sift together flour, baking powder, baking soda, salt and cinnamon. 


Add to wet ingredients and mix lightly.


Scoop the batter evenly among a 12 cup muffin pan.  Or, you can divide half the batter among a greased 12 cup muffin tin.  I used a medium cookie scoop, putting about one scoop of batter into each muffin cup. 


Drop 1/2 to 1 teaspoon of jam into each muffin cup.


Top with remaining batter (another medium cookie scoopful).  Bake at 400 degrees F for 25 minutes.


Muffins are done with a toothpick inserted in center comes out clean or they are firm, but spring back when touched and are gently browned.


Allow to cool for a few minutes in muffin tin (this give you crunchy edges), then remove to cooling racks.  Serve immediately or store in an airtight container for up to a week or freeze.

Makes 12 muffins.

Happy Baking,
The Cookie Princess

Thursday, February 3, 2011

Whoopie Pies


I'm embarrassed that I don't have more photos for you.  Since I made these at my mom's house, being out of my own kitchen and trying to orchestrate making a bunch of desserts with my sister, a pile of food and appetizers for dinner, watching a football game with my mom and having 3 kids running around, photos just weren't going to happen.  But I definitely plan on making these again, so I'll take oodles of photos then. 

These were amazing.  Everyone loved them--kids and adults.  And I couldn't get over how much they tasted like bakery whoopie pies.  The recipe is from a recent Penzey's Spices catalog and I didn't change anything about it.  The pies are so cakey and delicious and the marshmallow filling is truly authentic, although difficult to work with.  I piped it onto the pies and ended up putting on more than I should have.  It wasn't as thick as I would have liked, and the tops kept slipping off.  I actually used skewers to keep the tops on until they set up a little bit.  I may play with the filling to get a balance of marshmallow and butter cream.  I decided to roll mine in sprinkles, and a few of them I even dipped partially in ganache (leftover from Amy's dessert).  I would have dipped more, the filling was so slippery that they were too hard to handle for dipping.


Whoopie Pies


Ingredients (for the cake part)

1 egg
1/3 cup vegetable oil
1 cup sugar
2 cups flour
1/2 cup cocoa powder
1 teaspoon baking soda
1/4 teaspoon salt
3/4 cup buttermilk
1 teaspoon vanilla extract

In a large bowl, beat the egg and vegetable oil.  Gradually add the sugar and continue beating until pale yellow in color.   In another bowl, sift together flour, cocoa powder, baking soda and salt.  In a measuring cup, combine the buttermilk and the vanilla.

While mixing, alternate adding the dry ingredients and the buttermilk to the egg and sugar, beginning and ending with the dry ingredients.

Drop the batter onto parchment or silicone lined baking sheets (I used a medium cookie scoop).  These spread a lot, so I only put 6 cakes per sheet. 

Baker at 350 degrees F for 8-10 minutes, until the tops spring back to the touch. Turn baking sheet 180 degrees halfway through. If using more than one sheet at a time, rotate positions in the oven for more even baking.


Remove to wire racks to cool.


Ingredients (for filling)


1/2 cup butter, softened
1 cup powdered sugar, sifted
1 cup marshmallow creme
1 teaspoon vanilla extract


In a medium bowl, combine all of the ingredients and beat until light and fluffy.


When cakes are cool, spread or pipe filling onto the bottom of one cake. Top with another cake to make a sandwich.

Makes 12 pies.

Happy Baking,
The Cookie Princess