Funfetti time! Because tomorrow is my birthday and nothing says happy birthday like sprinkles. Lots and lots of sprinkles. I love whoopie pies but I haven't made them in ages. So since I got a new whoopie pie pan for Christmas (with my donut pan), I figured it was time. There are a handful of whoopie pie creations I'm looking forward to trying, but funfetti called my name. Soft, fluffy cakes oozing with marshmallow filling and rolled in more sprinkles seems like the right thing to do. The flavor is delicious and I think the marshmallow filling is just the right sweetness without making you want to pull your teeth out. My friend Rachel thought they could be sweeter. So just know going in that it'll either be spot on or little undersweet.
Searching for the right whoopie pie recipe to christen my new pan, I settled on Christina's recipe from Sweet Pea's Kitchen. I'm not normally a marshmallow cream filling kinda of gal, but I think this version is spot on. Smooth, creamy and lots of marshmallow flavor without a sickeningly sweet kick. I adjusted the method slightly by beating the butter and shortening together and used Princess Cake and Cookie Emulsion rather than vanilla extract in the cake part for a boost of cakey, funfetti flavor. But definitely just use vanilla extract if that's what you have. I used my whoopie pie pan, but this batter is sturdy enough to hold up to dropping by scoops onto a lined baking sheet, so don't skip this just because you don't have the pan (although if you like whoopie pies, invest in a pan to get perfectly uniform treats). I'm looking forward to lots more whoopie pies. I'll just need to come up with more excuses before my next birthday!
Funfetti Whoopie Pies
Ingredients for cakes
2 1/4 cups flour
2 teaspoons baking powder
1 teaspoon baking soda
1/2 teaspoon salt
1/4 cup butter, softened
3 Tablespoons shortening
3/4 sugar
1 egg
1 egg white
3/4 cup milk
1 teaspoon Princess Cake and Cookie Emulsion or vanilla extract
1/3 cup rainbow sprinkles
In a medium bowl, sift or whisk together flour, baking powder, baking soda and salt. Set aside.
Using a stand mixer and the paddle attachment or a large bowl with a hand held mixer, beat butter and shortening together until creamy, about 3 minutes.
Add sugar and continue beating until mixture is fluffy, scraping sides of bowl as needed.
One at a time, beat in the egg, egg white and emulsion/extract.
Gradually add flour, alternating with milk, and stir until just combined, taking care not to overmix. Fold in sprinkles.
Lightly spray a whoopie pie pan with cooking spray or line a baking sheet with parchment or Silpat. using a medium cookie scoop, fill the cavities on the tray about 2/3 full or drop heaping scoops on sheet about 2-3 inches apart.
Bake at 375 degrees F for 10 minutes until set, a tester inserted in the center comes out clean and the tops spring back and are gently golden.
Cool in or on pan for 2 minutes then transfer to wire racks to cool completely. Repeat with remaining batter. While cakes cool, make the filling.
Ingredients for filling
1 1/2 cups marshmallow fluff (a 7 ounce jar less 2 Tablespoons)
1 1/4 cups shortening
1 cup powdered sugar
1 teaspoon vanilla extract
1/3 cup sprinkles for garnish
Use the whisk attachment for a stand mixer (or a hand held mixer), and beat the fluff and shortening until creamy, about 3-4 minutes.
Reduce speed and gradually add powdered sugar, then add extract. Once incorporated, increase speed to high and beat until fluffy and airy, about 5 minutes.
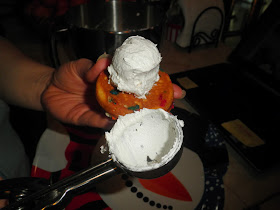
Flip over half the cakes to the flat side is up. Transfer filling to a piping bag or use a medium cookie scoop to dollop onto the flat sided cakes. Top with another unfrosted cake and press on the center to ooze the filling out to the edges. Roll the edges in sprinkles. Continue until all the whoopie pies are assembled and serve, store in an airtight container for up to a week or freeze.
Makes 12 whoopie pies.
Happy Baking,
The Cookie Princess
Printer Friendly Recipe


No comments:
Post a Comment